 dp50mm
Phenotype Augmented Reality iOS app
[work-in-progress]
Overview
- Augmented reality
- Smartphone platform
- Interaction
- Existing technology
- Aruco markers
- Implementation on iOS
- Camera calibration
- Marker detection & orientation
- Image management
- Neural network training
- Overlays
Tutorial
This is a step-by-step tutorial for implementing Aruco marker detection and Neural Network phenotype detection in iOS with information overlays for augmenting reality. It is written as documentation for my graduation project. The goal of the project is to enable new ways of making observations and conclusions in experiments with growing plants and make them more easily shareable for DIY experimenters and plant growers by augmenting reality with digitally stored and analysed images. The goal in writing this tutorial is to contain all relevant conceptual and technical documentation.
Observations
The use of visual communication in the form of illustrations goes back a long way in biology.
Illustration from the book Histoire naturelle by Louis Renard, published in Amsterdam in 1754.
Making drawings of the phenomenon that is the subject of study is still regular practice in high-school.
Digital imaging
In the past this required a lot of sketching skills. These days images can quickly be captured through digital cameras everyone has on them everyday. This enables new modes of communication in the practice of biological research.
Visual storytelling
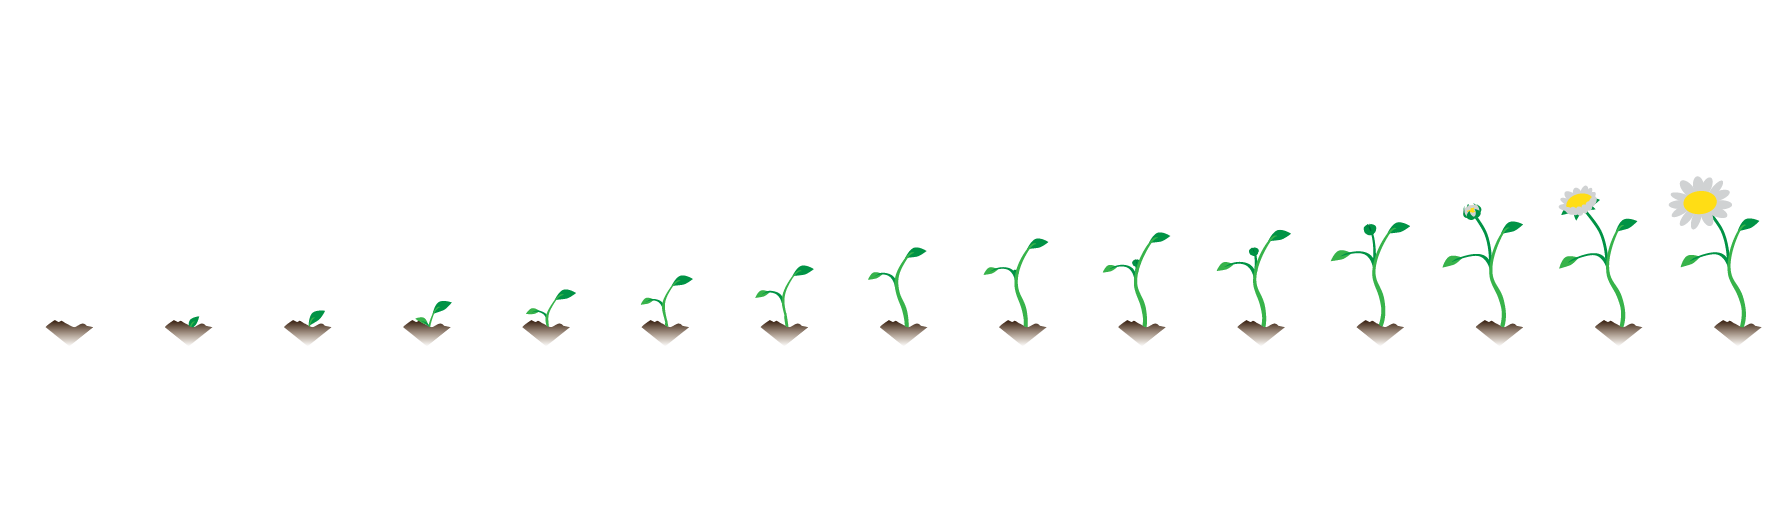
By compiling a series of images an order in events can be implied and highlighted, experience can be recreated or synthesized.
Interactive visuals
Another step further is to create interactive graphics that let the observer navigate an experience motivated by their own intentionality.
Possibilities
There are opportunities in both the capture and navigation of images. The application to be developed in this tutorial allows you to more easily compile series and collections of images along dimensions such as location, orientation and time. The application also enables you to view previously captured observations within the context of the current reality being captured in the live-camera. A next step is to increase the number of dimensions for ordering images by generating algorithms (neural networks) to detect phenomena in the image.
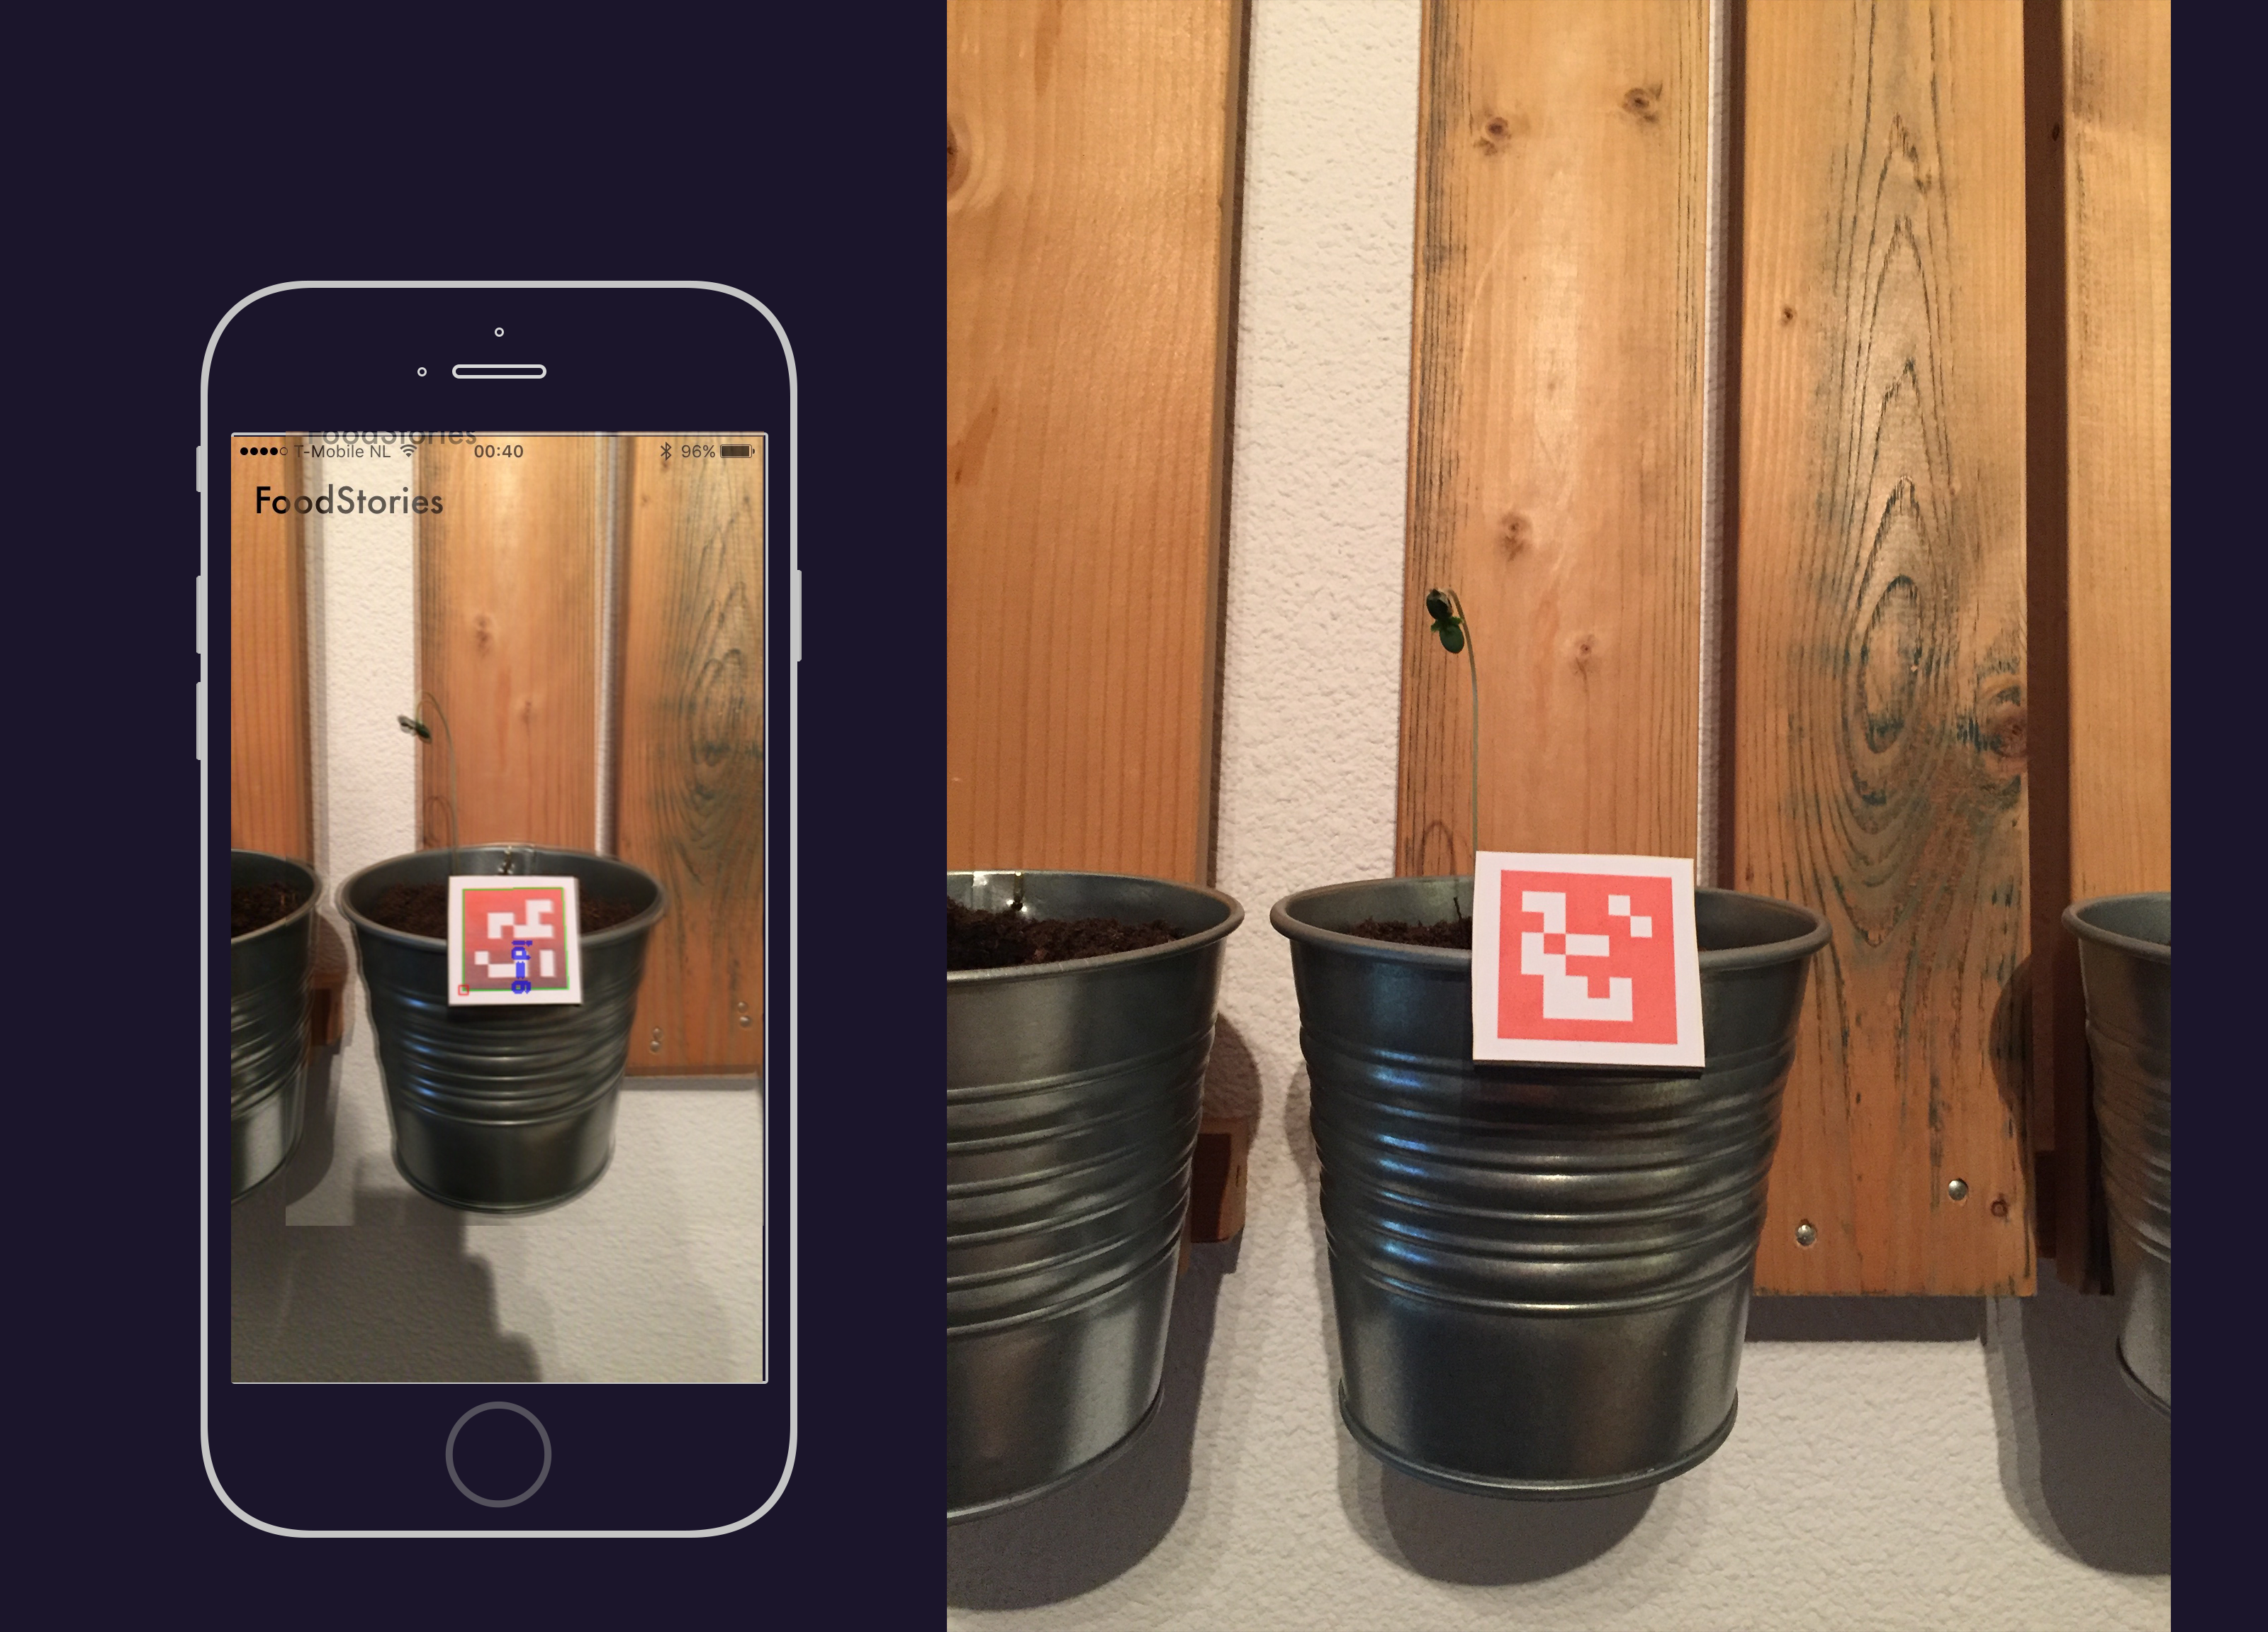
The technique to capture the location, orientation and time of images is through the use of Aruco markers (a type of fiducial marker). Aruco markers can be detected in an image by id as well as pose (location + orientation). In a garden setup the marker should remain stationary with the plant. Then the camera position can be deducted from the marker orientation, relative to previous images containing the same marker.
Functionalities
- Re-orient images to match perspectives based on aruco markers.
- Train neural networks to detect various biological phenomena.
The Neural Networks are used for detecting various phenomena in the image. The goal is to create an application where images can be re-oriented to match previous perspectives on reality as well as real-time video feeds. In this tutorial we go over the various steps of image processing necessary to produce the functionalities described above.
Augmented reality
Augmented reality is a live direct or indirect view of the physical real world being augmented by a computer for example.
Smartphone platform
What is commonly known as the smartphone is a computing platform ready to use for augmented reality development.
- It provides a camera to digitally capture a perspective on reality.
- A computer to analyse and augment data.
- A digital touch-screen to display for display and input of data.
Combining these things together, a livestream of the digital camera can be displayed and interacted with on the screen with computed augmentations.
System architecture
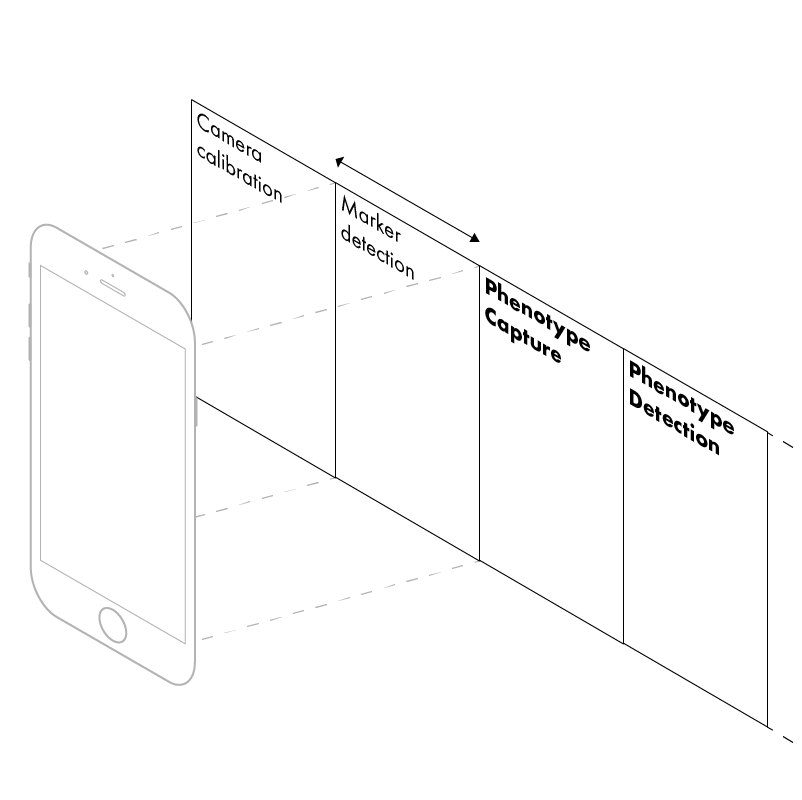
In the following steps is described how the functionalities as specified above can be built on the iOS smartphone platform. Each of the described components requires code to enable the functionality. First an interaction model is described for analysing views. Secondly the iOS camera architecture is covered.
Interaction
Image detection and analysis produces numerous augmented views. In development and interaction it's useful to continuously have quick access to all of them. With a horizontal scroll-view in iOS each of the views can be put next to each other.
Views
The multiple views provide augmented perspectives on the live camera image-feed.
Image capture
With a button an image can be captured for storage.
iOS / iPhone camera
The iPhone has a powerful camera to capture live video streams for augmented reality applications. It is controlable through the AV Foundation framework in the iOS operating system. First the user-facing functionalities are covered. These are the real-time camera stream and image capture. Both functionalities require precise control over the camera data flow through the AVFoundation framework, API and multi-threading of processes so that during the capture process the UI always remains responsive.
Real-time stream
The core of AR is the display and analysis of a live camera stream with overlays. Camera sensor data needs to be captured, processed, and displayed in real-time.
Image capture
In this application images can be captured to be integrated in the AR layers.
AVFoundation structure
The AVFoundation framework has defined multiple objects to control the hardware and data flows. The following schematic provides an overview of the data flow between the various objects.
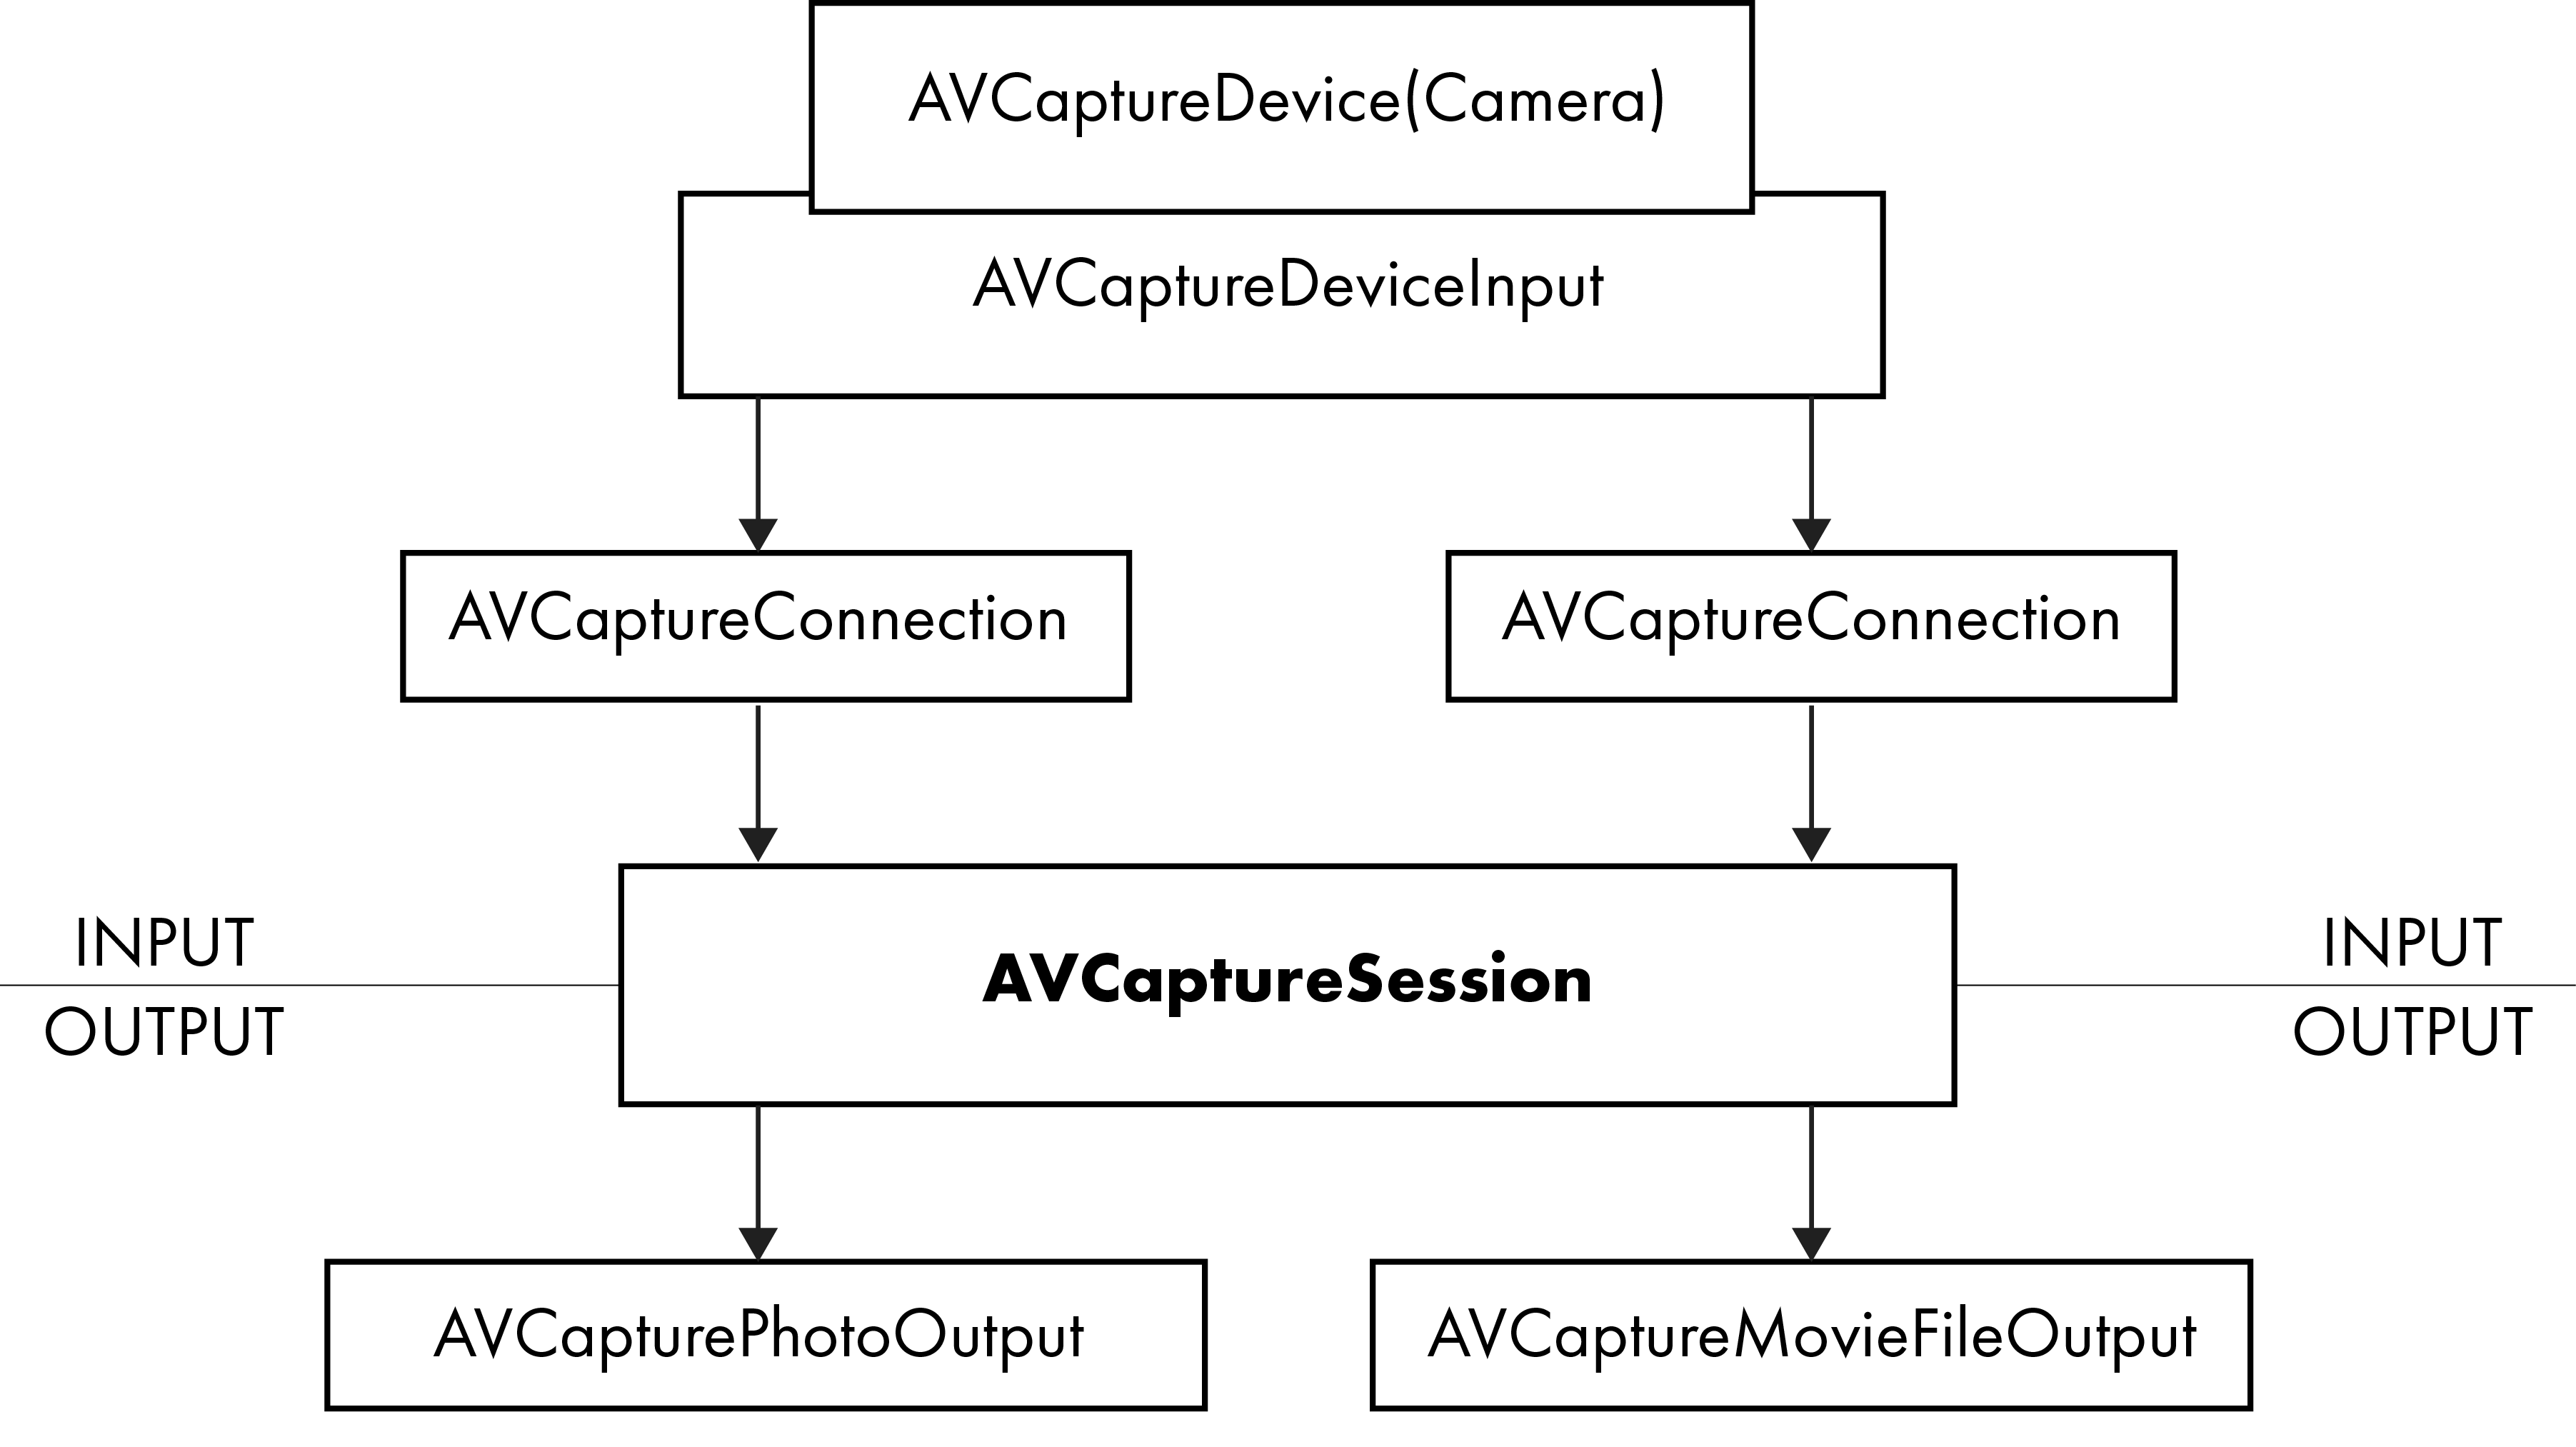
- AVCaptureSession is the core object where everything comes together.
- AVCaptureDevice is the object representing the physical camera in the iOS device. It provides the input data (both audio and video) for an AVCaptureSession object.
- AVCaptureConnection connects the input to an output through the AVCaptureSession.
- AVCapturePhotoOutput provides the software interface for capture workflows related to still photography.
- AVCapturePhotoOutput provides the software interface for capture workflows related to still photography.
This defines the overall structure of the AVFoundation framework. To implement the specified functionalities of real-time augmented streaming and image capture two specific implementations need to be programmed in such a way that they do not interfere with each other in camera usage and processing capacity.
Real-time augmented streaming implementation
Capturing & storing photos
To access the camera on various iOS devices an AV capture device object is created in the code.
When you want to capture a photo you call the function capturePhoto() and pass it two objects.
-
Photo Settings.
AVCapturePhotoSettings -
The photo capture delegate.
AVCapturePhotoCaptureDelegate
Image analysis
This application of computer vision has been built and implemented in various open and closed libraries. To detect these the openCV library is used with the Aruco module.
Aruco markers
Pose estimation
We want to know the rotation and translation for each detected marker. The function estimatePoseSingleMarkers gives us these. It takes the following attributes: corners, markerSize, cameraMatrix, distCoeffs, rvecs, tvecs. The rvecs & tvecs are arrays of vectors.
- rvec: Rotation vector
- tvec: Translation vector
The detectMarkers function provides the initial array of markers together with the ids. So to create the final output of markers we go through the following steps:
- get image
- get camera parameters
- get the camera parameters
- detect markers
- loop through markers for pose detection
- Return poses to main application
iOS Application architecture
OpenCV as a C library can be used on iOS through Objective-C. The current standard for programming in iOS is the Swift programming language. To use the capabilities of OpenCV in Swift wrapper code needs to be written. On the one hand functions need to be called from Swift code and data needs to be returned from Objective C to the Swift function calls.
Calling Objective-C functions from swift
Returning data to Swift functions
Interacting With Objective-C Apis
Camera calibration
The lens system of a camera distorts the captured image. The pose estimation function of the Aruco module requires parameters to correct for that distortion. These are a cameraMatrix object and distCoeffs object as defined by the OpenCV calib3d camera calibration module. In this part of the tutorial we go over how these are determined for a camera.
Distortion
The lens distortion can be categorized in two mayor transformations:
- radial transformation
- tangential transformation
OpenCV has tools to correct for this distortion in the form of a Camera Matrix object, Algorithms to determine the distortion parameters of the lens as well as corrections for applications.
Camera Matrix
The camera matrix contains the following parameters in a matrix format:
fx (focal length in pixel units)
fy (focal length in pixel units)
cx (center x)
cy (center y)
These parameters scale with the image resolution.
This is stored in a 3x3 matrix.
Distortion co-efficients
These are stored in a 5x1 matrix.
Augmentation layers
You can do a couple of augmentations to the data stream. The input data stream can be filtered. A simple example is cropping the photo. The input data stream can be transformed. For example the photo can be made black & white. The input data stream can be analysed. For example markers can be detected. The output data stream can be adapted in various ways as well. Extra information can be added. For example a timer. In this application previously captured photos (i.e. observations) of the same marker should be recalled and displayed within the context of a currently visible marker in the realtime camera stream.
3D Graphics
To work with and display 3d graphics on a high level, Apple has created the SceneKit library.